I had just a couple of days in New York, grateful to my dad for having come and visit! Also, I wanted to make up for the total lack of pictures from last time I visited The City, so I planned a couple of hours of walking around here and there. There were 2-3 pictures I knew I wanted to take (an HDR of Times Square, a picture of the Brooklyn Bridge and one down in the subway that I eventually forgot), but for the rest the plan was simply walking around different neighbourhoods and get the "street photographer" in me to come out. After a couple of hours and awkward attempts, I felt like slipping back (at least a tiny amount) into that "mode".
What is the street photography "mode"?
--> openness to your surrounding and people with a quick use of the camera to catch a good "lively" shot (and maybe symbolic) of what life happening on the streets is. Easier said than done, it's probably one of the most challenging ways of getting pictures - at least for me. It's the people who are most difficult to approach, yet are the core subject of street photography. If you have ever tried it yourself, you know how awkward it can get. These were the questions spinning wildly in my head when walking around in what I wanted to be "street photography mode": 1) "Should I keep my camera on me or in the bag?", 2) "Should I approach the person first asking to take a picture, or should I take it and ask permission to keep it afterward?", 3) "which focal length and aperture and shutter speed and ISO should I use?", 4) "....what the hell is a good & symbolic shot of the streets?". Well, I'll answer those questions myself (for myself) now!
1) Bag or no bag? As always, it depends. My camera is pretty big and bulky, so I hold it in my hand with a strap instead of around the neck. This way... well, first of all I look less like a tourist (despite being a tourist). Second, I just think it's more comfortable instead of having it jump up and down on my chest, but this might be a personal preference. Third, I feel readier to both shoot or put it back in the bag. However (#1), I would say the best mode overall is to have the camera in the bag. Why is that? It's true you might miss some shots that if you were not ready that second, they are gone - but it's also true that with the camera in hand you'll take pictures of everything forgetting to look around to what surrounds you (instead of looking for the shot). This eventually leads to get a sort of understanding of what is around you, and grasping the meaning of what a "symbolic" shot could be. Especially in areas where the cultural gap between you and "the streets" is bigger, you don't wanna enter them as "the guy with the camera". Too hawk-ish. However (#2), in NYC nobody cared at all, the cultural gap was small, I did only have a couple of hours to go around, so... I mostly kept it in my hand. =P
Above: 20mm, ISO 1250, f/11, 1/1600 sec - clearly not the right settings (ISO way too high, and so the aperture - would have been nice to have a bit more bokeh (blurred background) around her). I was actually taking a picture of the fountain with the background, so that it the reason of the for the 20mm (wide-angle) and the settings. She just made her way across, so who am I not to portray her in all her frappucino's majesty? ;) So here again, having the camera out of the bag gave me one of those quick shots opportunities.
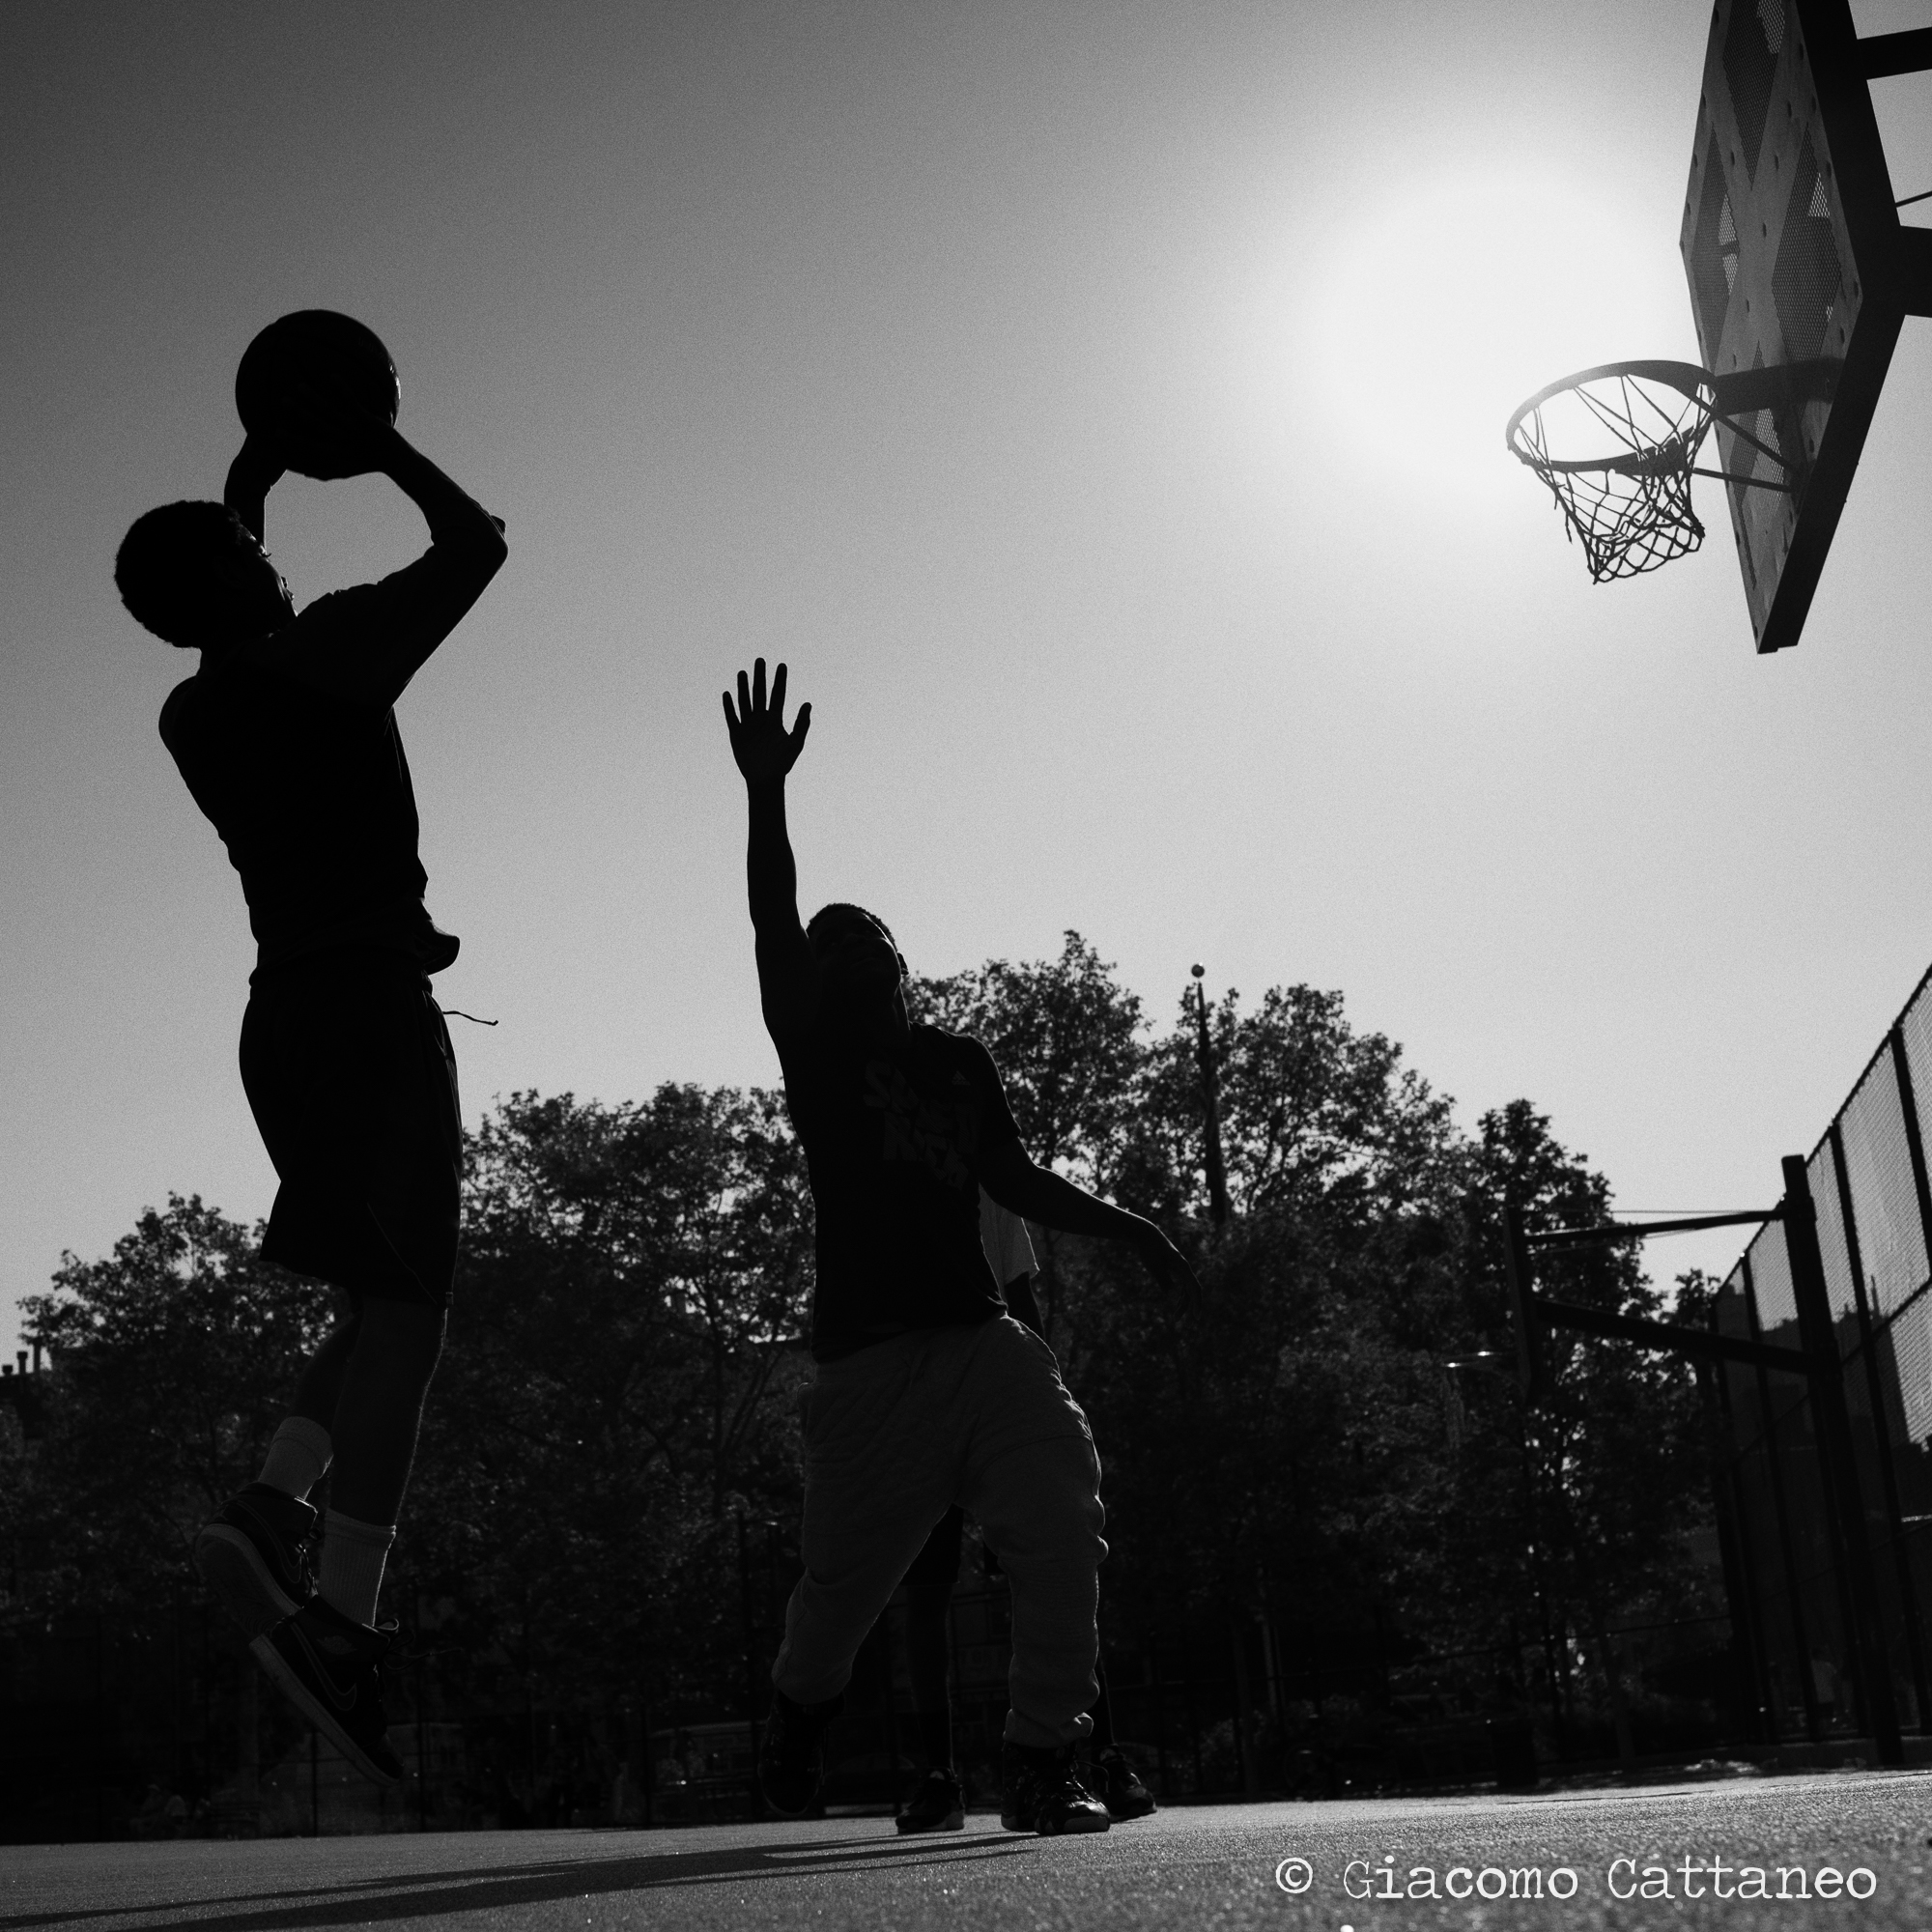
Below: 35mm, ISO 50, f/5.0, 1/1000 - I happened to come by a basketball court with my camera out, and the kids there asked me if I was a photographer or a tourist - I took out one of my visit cards, and told them that if they let me take some pictures of them playing their best game, I might publish them on my website later on. Guys, if you see this - I hope you like the pic ;)
2) How to approach people? Both ways! What I remember after 8 months of travel, is that I could talk to people so damn easily - thus the "total" openness. My camera, instead of a wall between me and the subjects, became the connection, either by shooting first and then approaching the person to show them the picture (you'd be surprised by how many people are happy to see themselves captured in a nice picture!) OR by talking to them first, getting to know them, their name, what they are doing and why, and then take a nice portrait. They will yield two different kind of images, but both are worth doing as the third option - taking the picture and going away - really leaves you with some bitter aftertaste. Also, you are missing out the most beautiful thing about street photography: understanding where you are. In the last years I did struggle a lot to approach people the way I did before. So I did not take pictures (still, don't do the 3rd option!!!). Nevertheless, this time I pushed myself a bit more and managed to talk to all the very different characters here below, turning these pictures into memories of a "real" moments. Totally worth it!

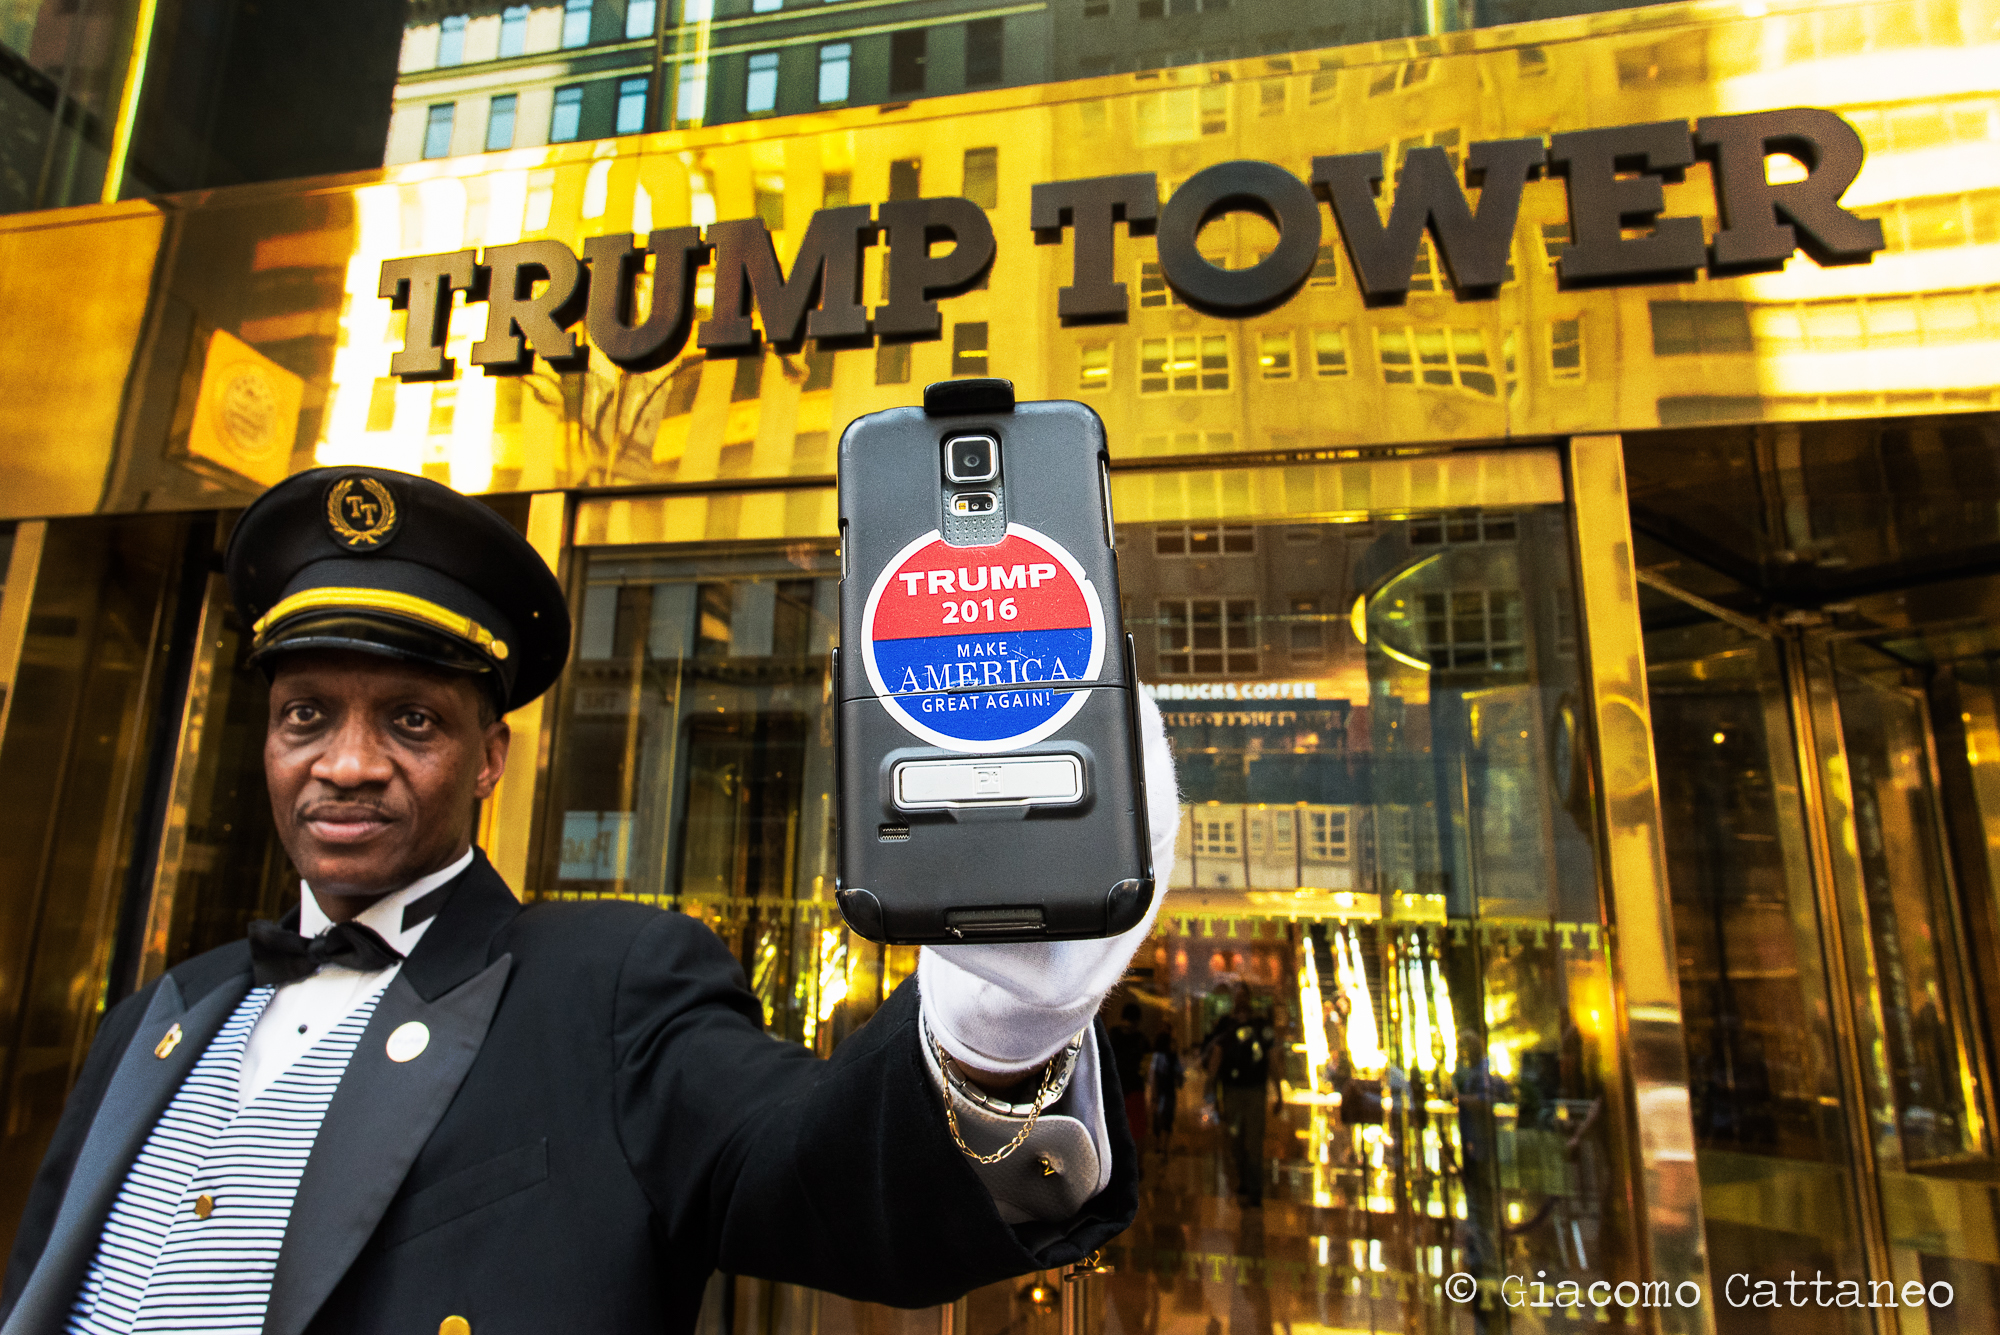


3) Which settings should I use? Well, guess what, it depends - again. Still, I had a "default mode" with my 35mm lens set at f/4-5 and ISO quite high-ish (400-800 depending on the time of the day). This granted me to get both subjects in the picture with a little bit of a background in any situation. A 50mm would be great as well, but if you want to catch some action and you are not exactly positioned in the right place, you might end up leaving a lot out of the frame - a 35mm will grant you to catch everything every time, leaving it for you to crop it afterwards. The fast aperture of f/4 or f/5 allows to get the subject in focus and the background blurred (bokeh) (which is a typical "look" for a picture taken on the street), while at the same time ensuring fast shutter speed and higher probabilities of getting the focus wrong, both key to get your subjects sharp. This reasons also goes for the high-ish ISO, despite lowering the overall quality (which does not really matter for these pictures), it grants you fast shutter speed. After that, style is up to you - with Ryan up above, I wanted the background with the buildings and taxis "closer" to him (thus a 50mm - after I first tried a 35mm), while for... damn it I forgot his name! Well, Mr. Trump up there, with a 35mm I would not get the BOOM! of the phone slapped in my face, which is what I was going for. Thus, I switched to a 20mm that magnifies the objects closer to you, and reduces in size those far away, hence giving me the look I was going for. If you want a better explanation of of focal lengths work on perspective, have a look at this video that despite being for motion picture, delivers a good pragmatic explanation.
4) What makes it a decent "street photography" shot? I guess everybody is entitled to have is own opinion on that, and they'd be right. As for me, the two pictures below speak to me more than the others. Why? Well... every good picture in my opinion tells a story. And compared to the others, the two below tell a more interesting one. That is what makes a good shot. Do I linger on the picture, or just move to the next? For that reason, I will not tell you anything, and let the pictures tell their stories themselves.
(Still, if you wanna know how I took the picture, there are some notes in between the pictures, even though that will somehow detract from the picture's power).
Above: 50mm, ISO 50, f/9.0, 1/5sec - I stood here for a well 20min using different lenses, different shutter speeds, and kind of experimenting to hold the camera very low touching the ground. Also, there is the Empire State Building in the background, but I cropped it out (whaaat?) as it took away the focus from the contrast between the homeless and the shopper. Also, I removed a small white sign on above his shoulders as it dragged away the eye from his hands. Ethical question, should I have, or not? I usually do not - yet, in some cases, if the essence of the picture remains the same one can have a certain leeway. As Steve McCurry has recently said in response to allegations of using photoshop to alter his pictures, "Some would say that was wrong, but I thought it was appropriate because the truth and integrity of the picture were maintained" - see the article here.
Below: 35mm, ISO 1100, f/3.5, 1/40 - I was sipping coffee at Starbucks while working next to Times Square, while one of these guys that stand there to take pictures with you (the usual Spiderman and Batman) just passes me by to go to the toiled - Mickey Mouse! So... yeah, a bit embarrassed I ask the lady next to me if she could watch my computer for a sec, I grab my camera from the bag and head for the toilet (already awkward, why would anybody bring a big camera to the toilet?). I got there a bit too "early", meaning that the guy was there still pissing - and I just stood by with my camera. Of course you don't take the picture while he's pissing, cmon that would be too much. Yet, when I explained him what I wanted (imagine asking Mickey Mouse "hey dude, can I take a picture of you pissing" - that is what happened) he had a laugh and we set it up.

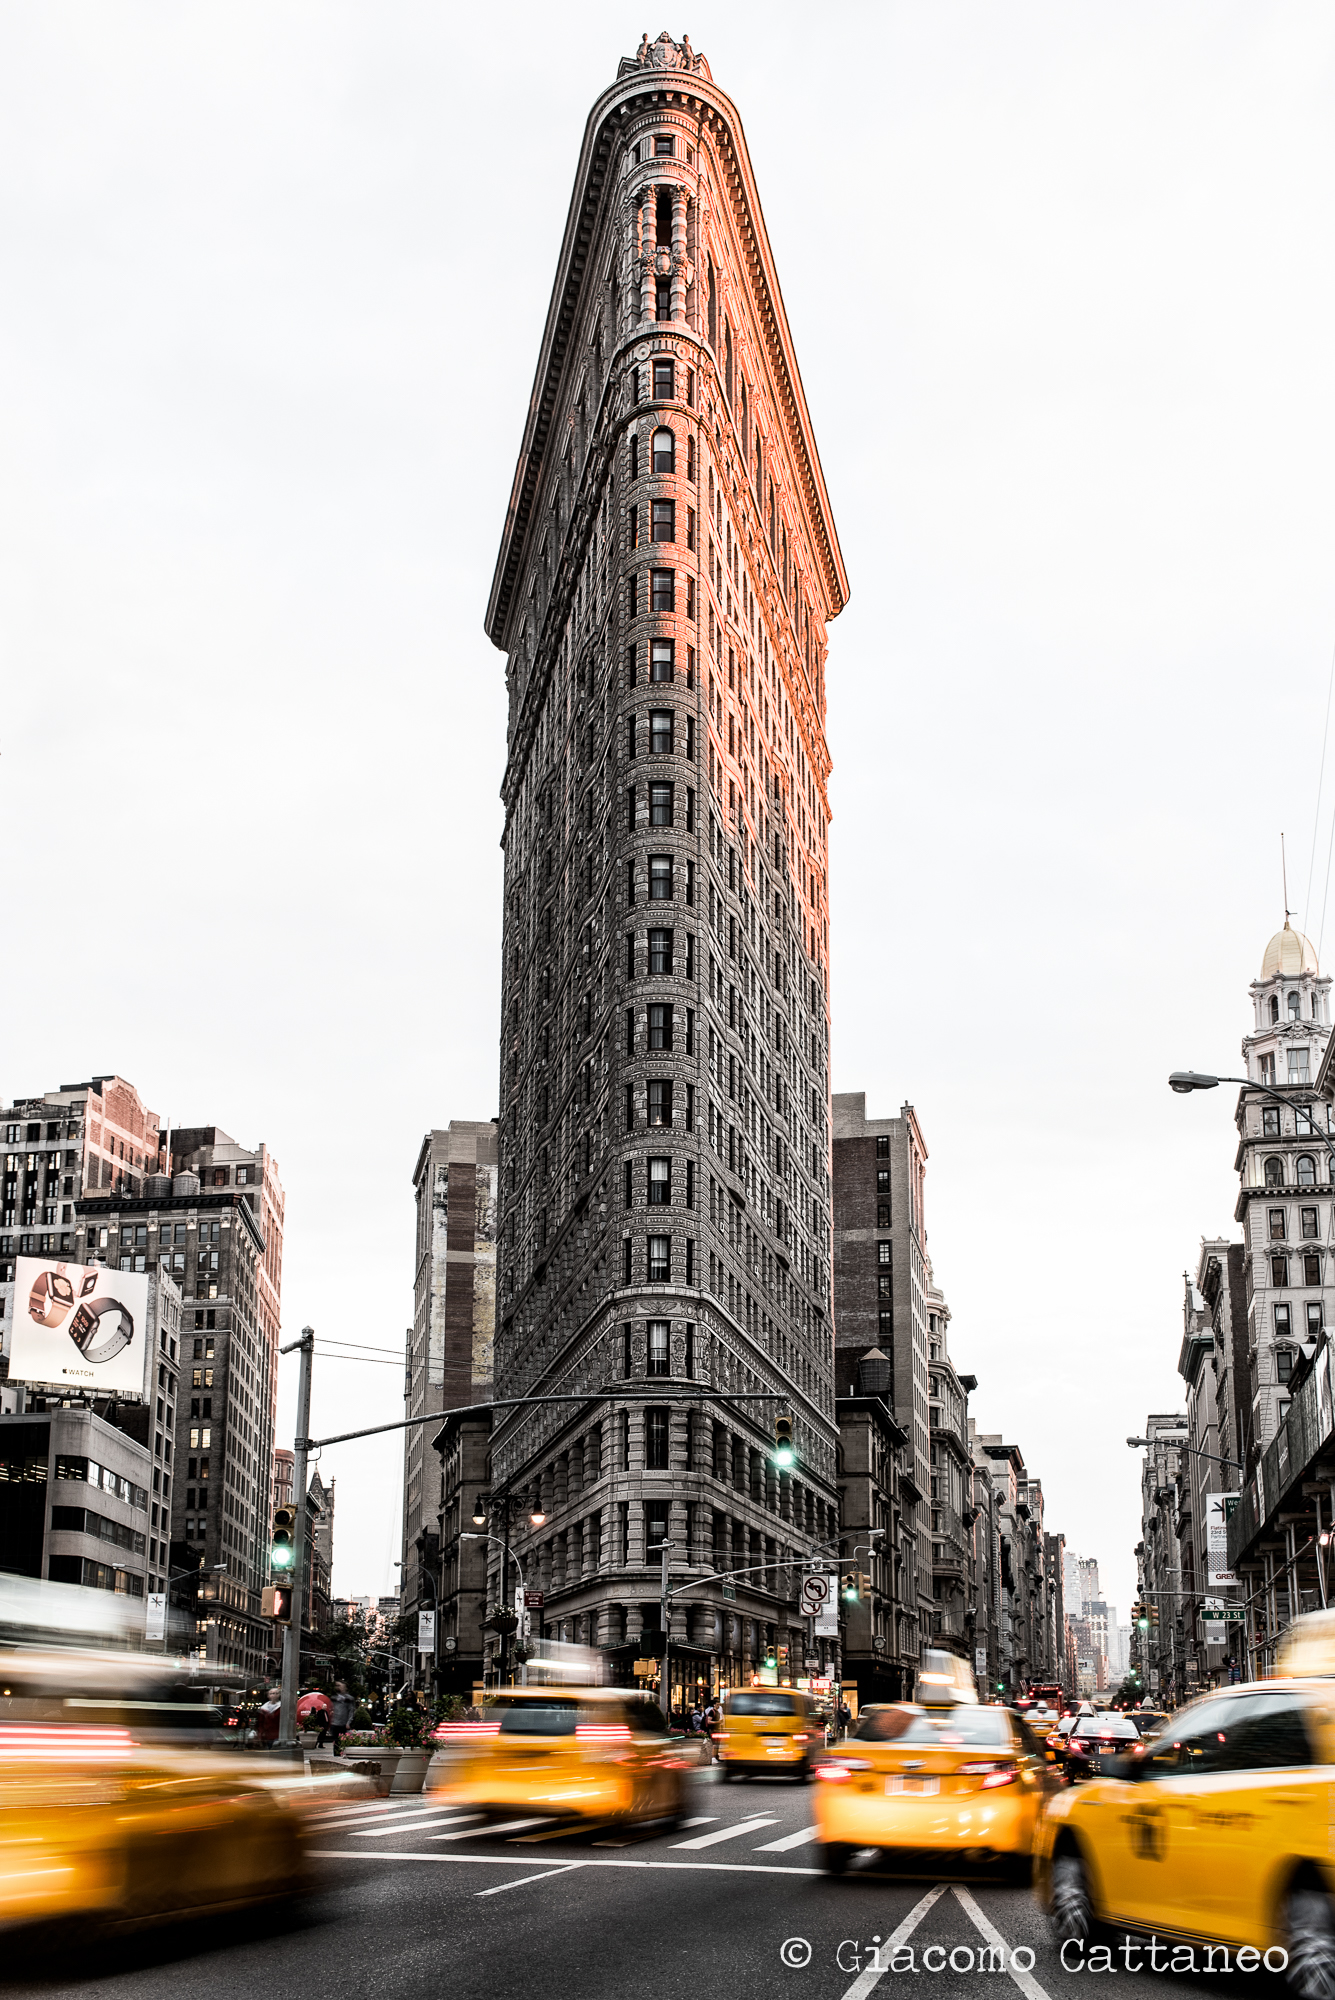
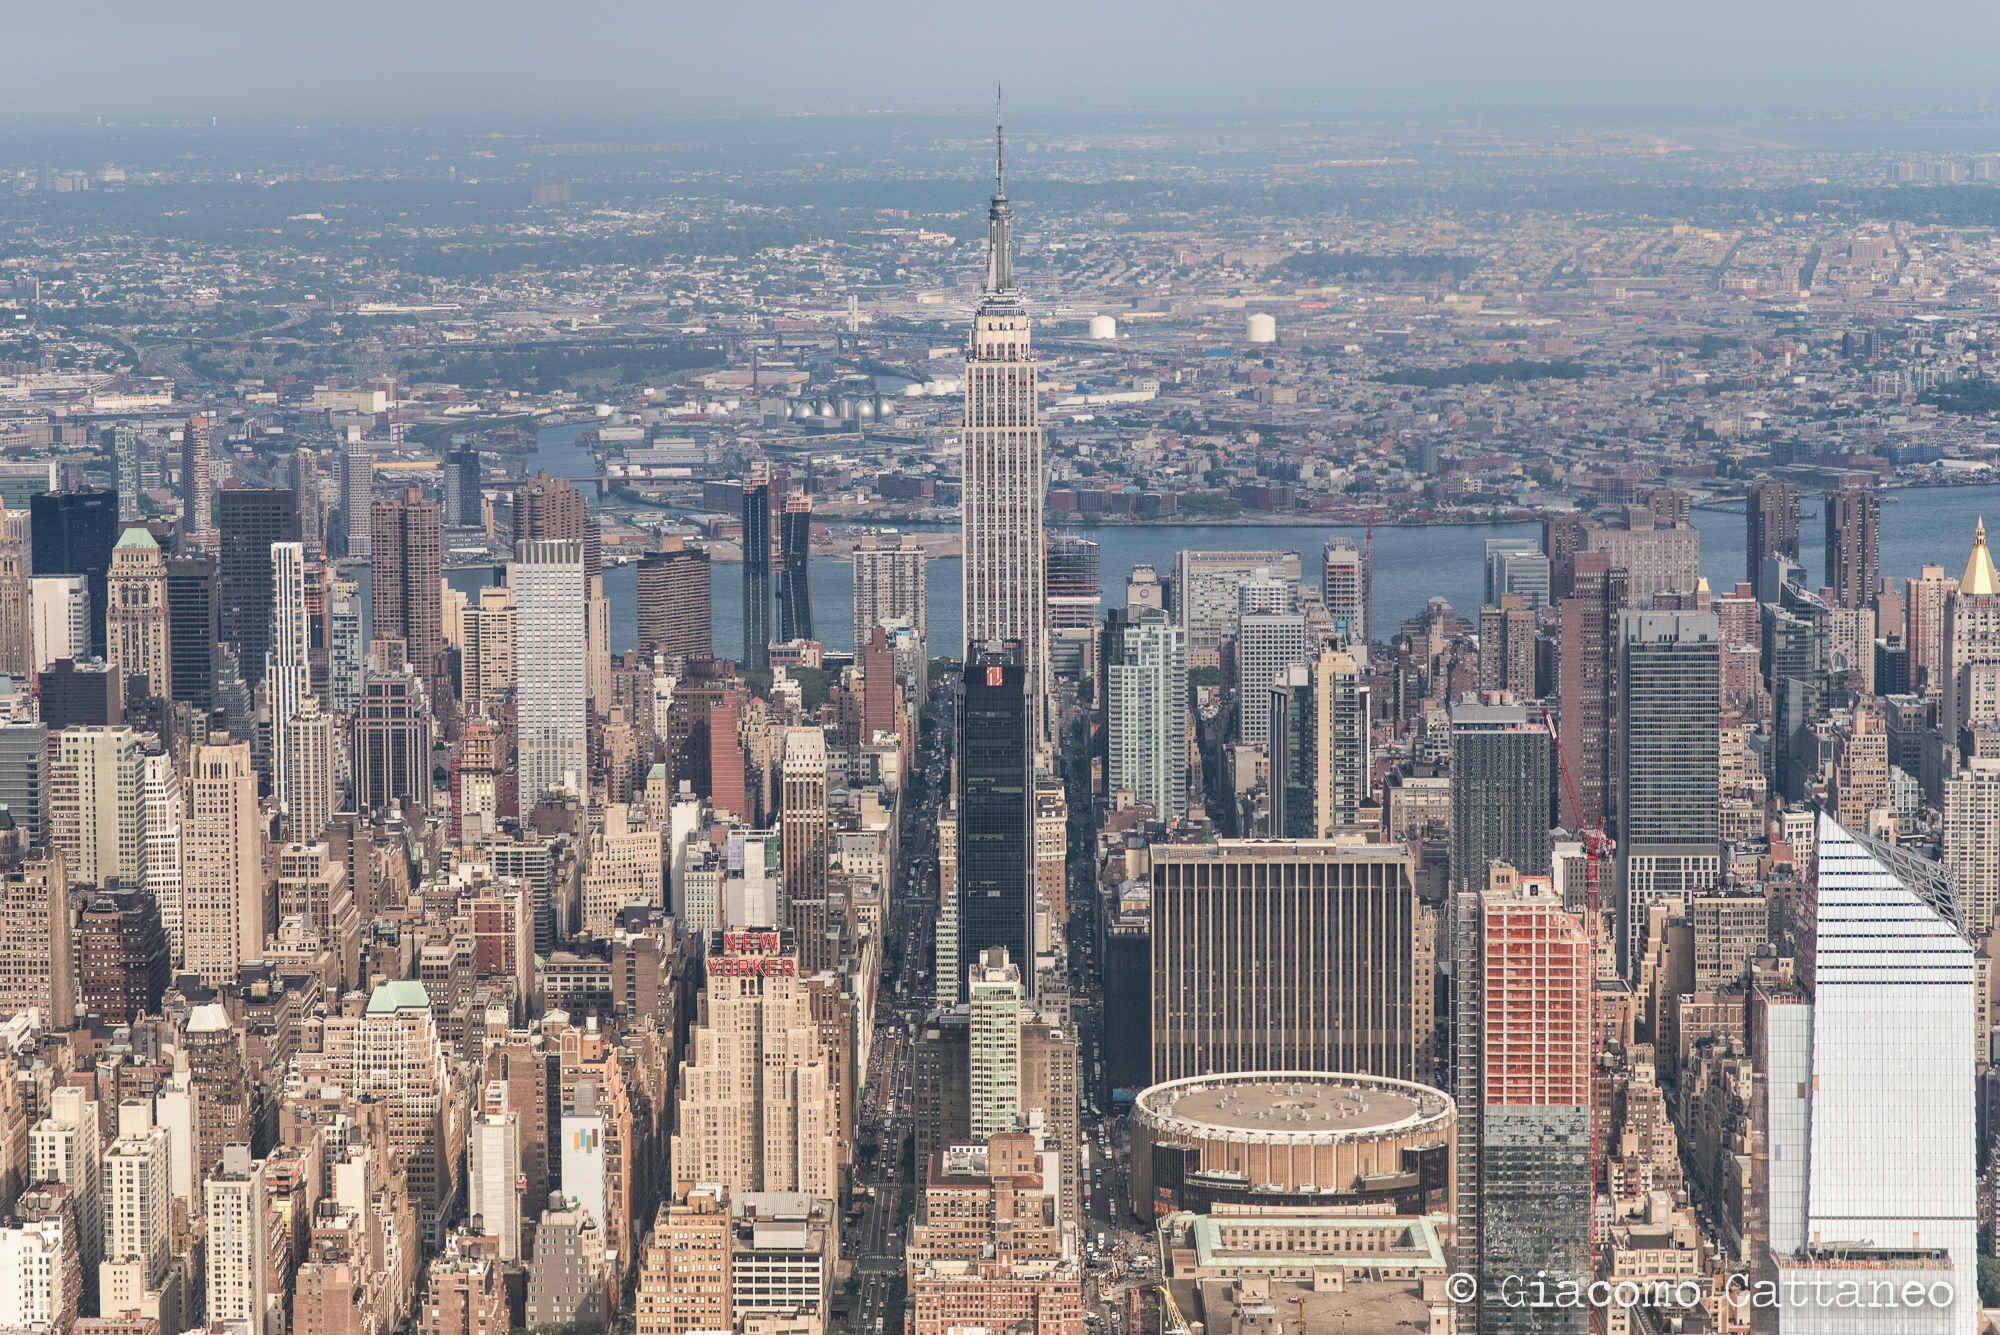
Photographing the "icons"
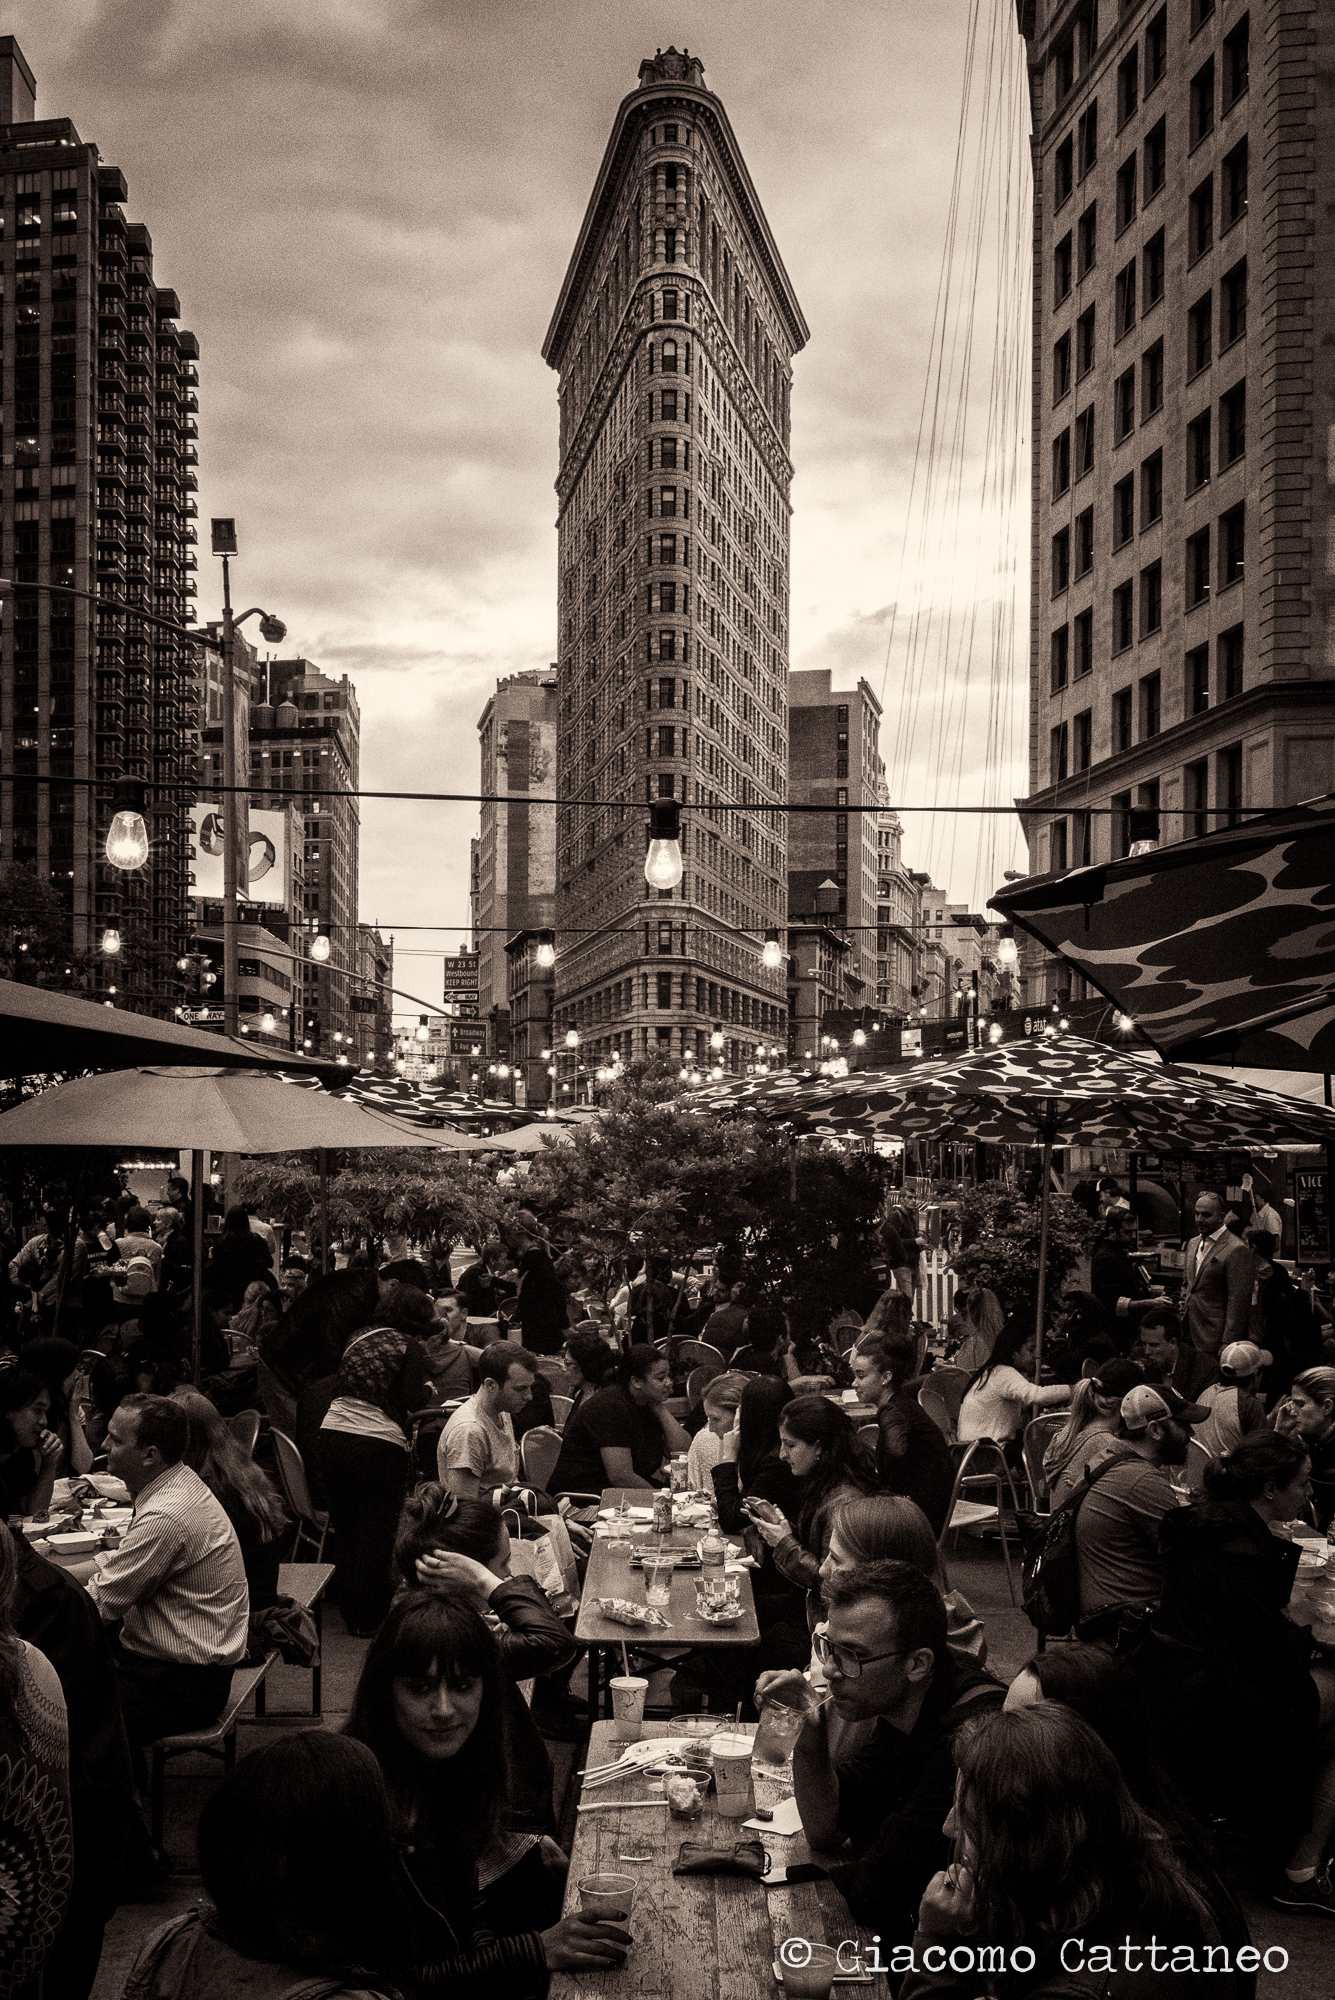
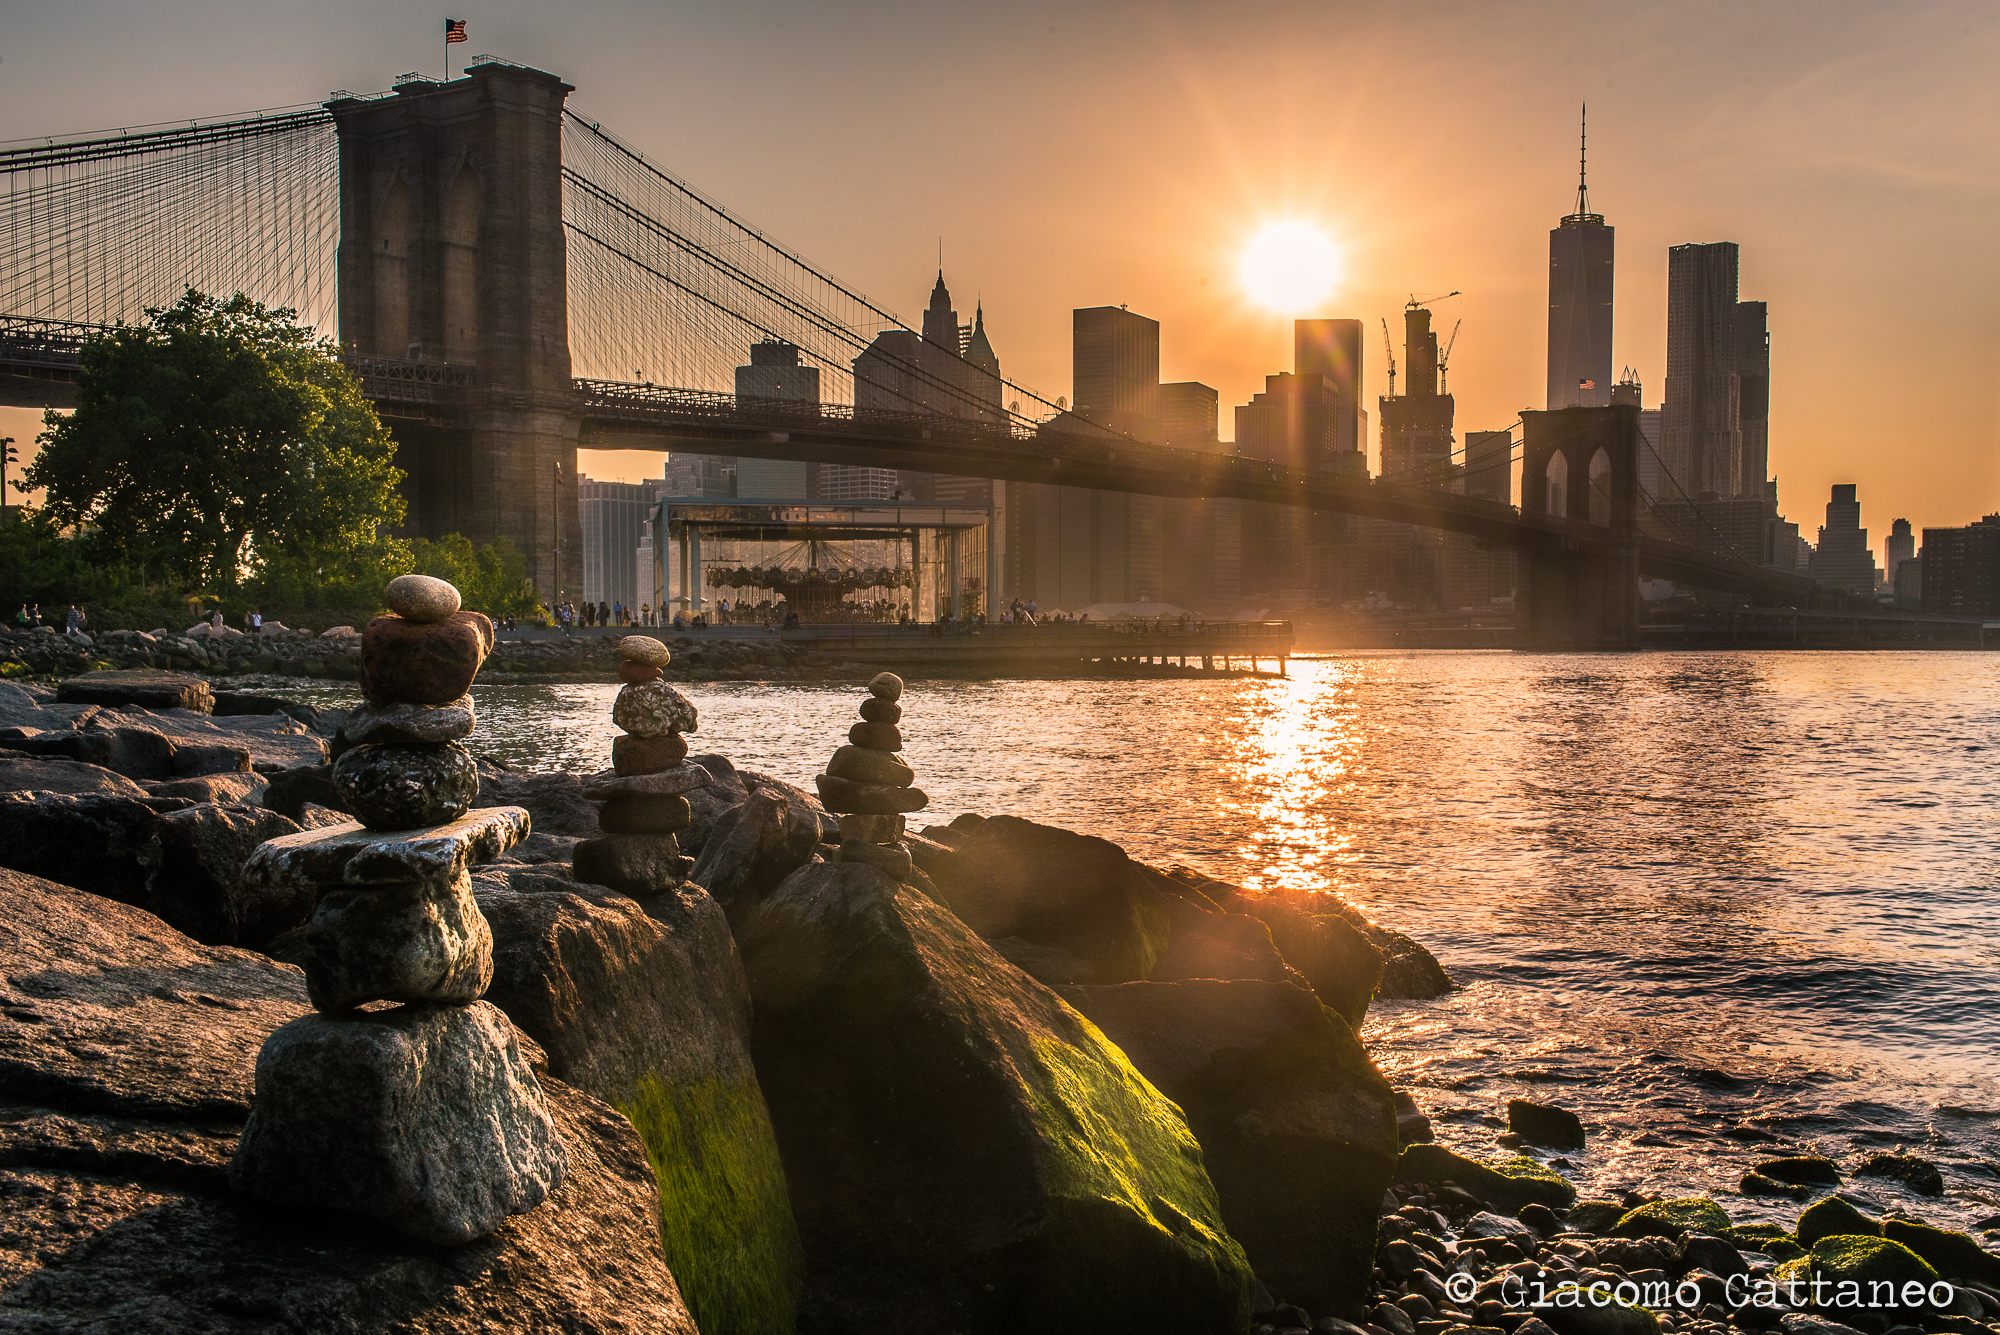
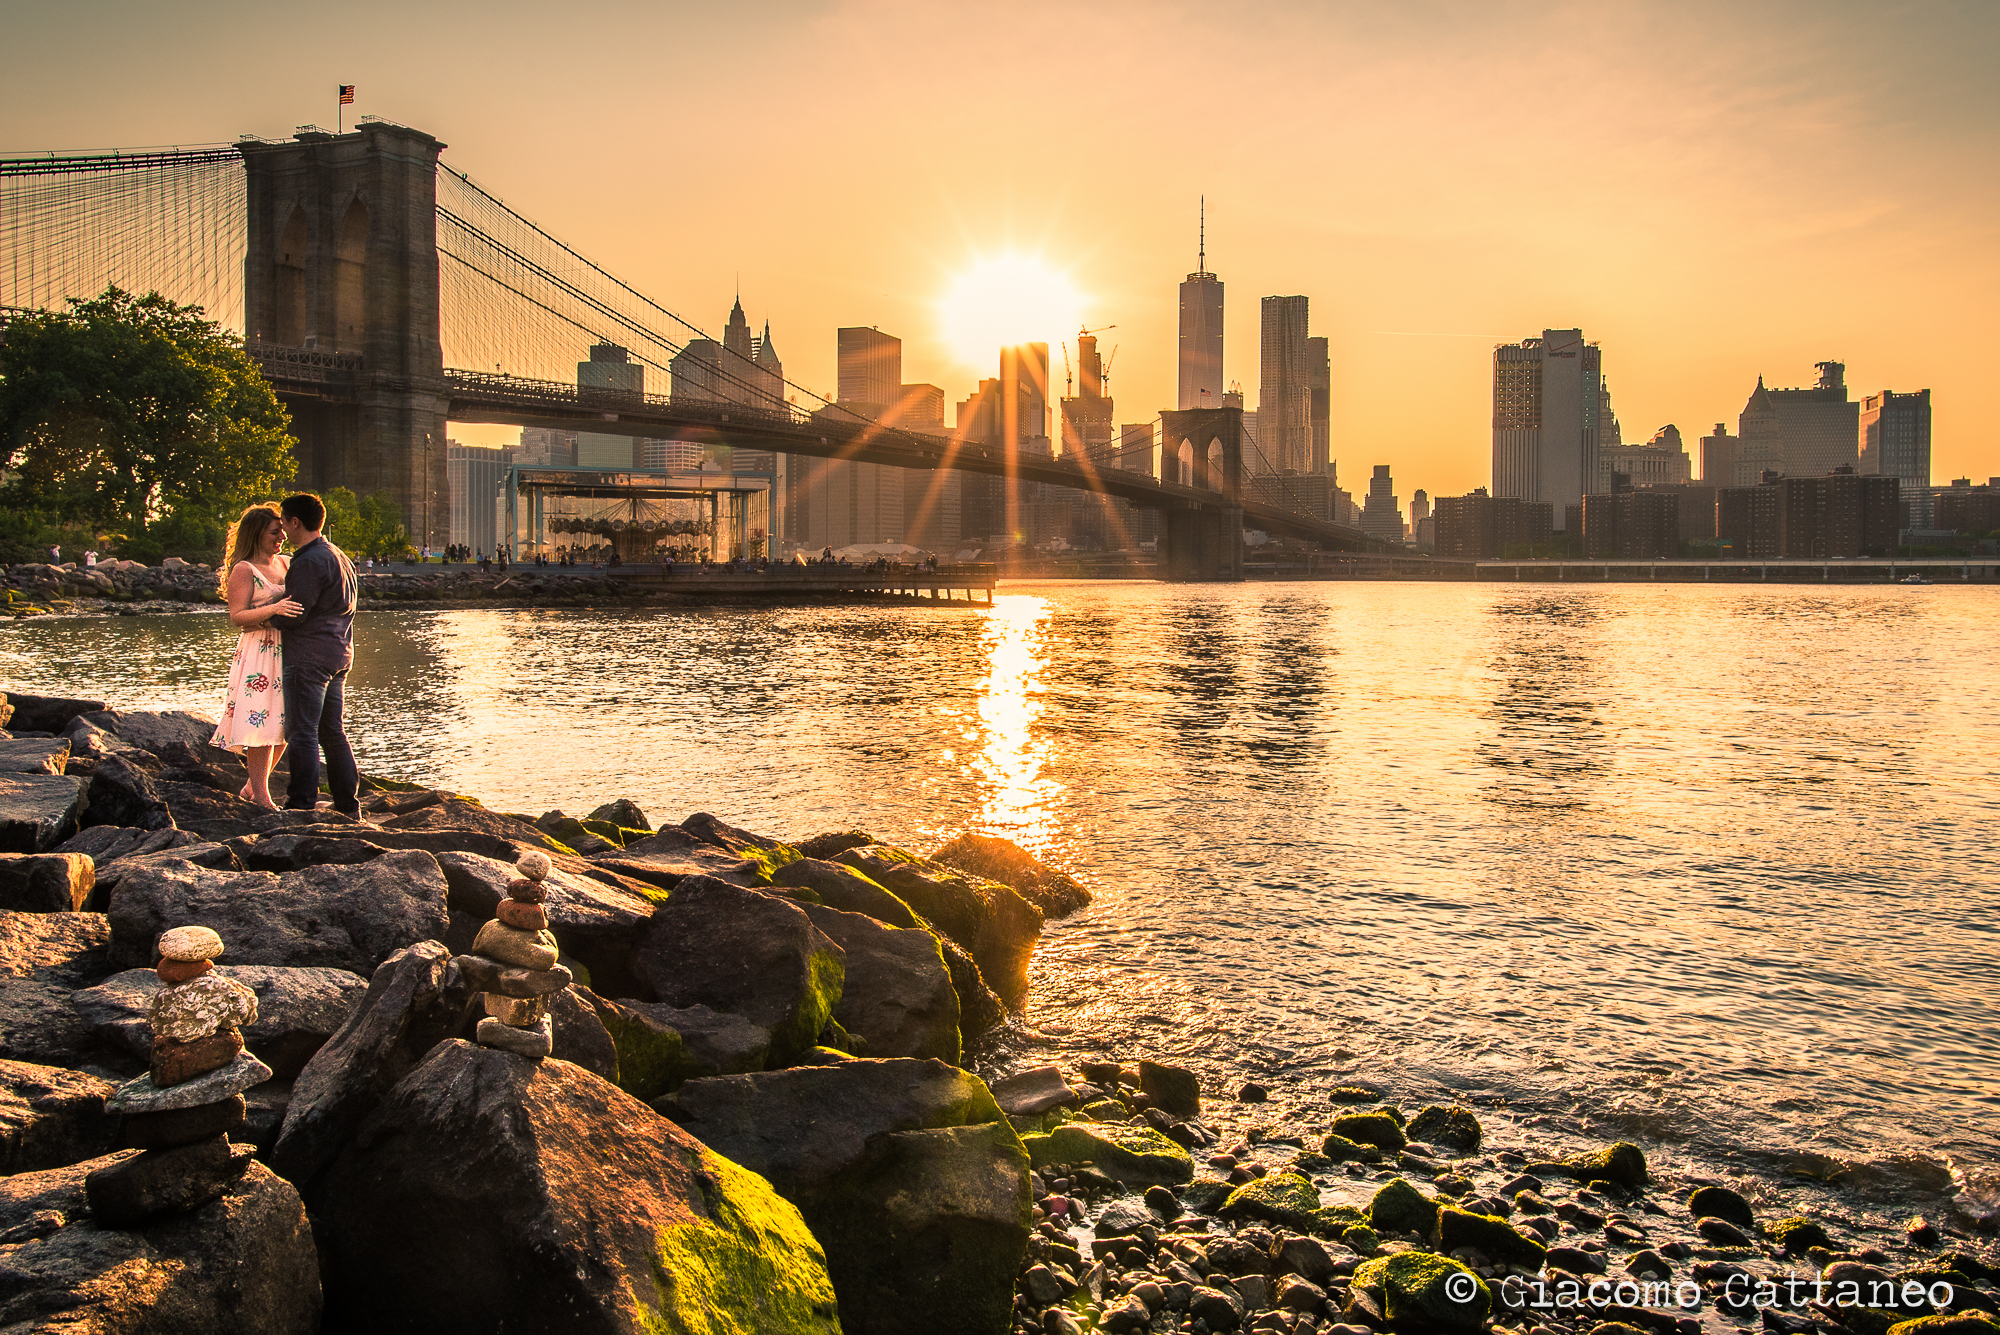
As in every great location, there is the street photography where you look for the symbols that make the daily lives of people, and there are the symbols for which the city is recognised worldwide, those that are on the travel magazines and books. Here below a gallery of my takes on such icons, some "you've seen already" (i.e. those with the yellow taxis for example):

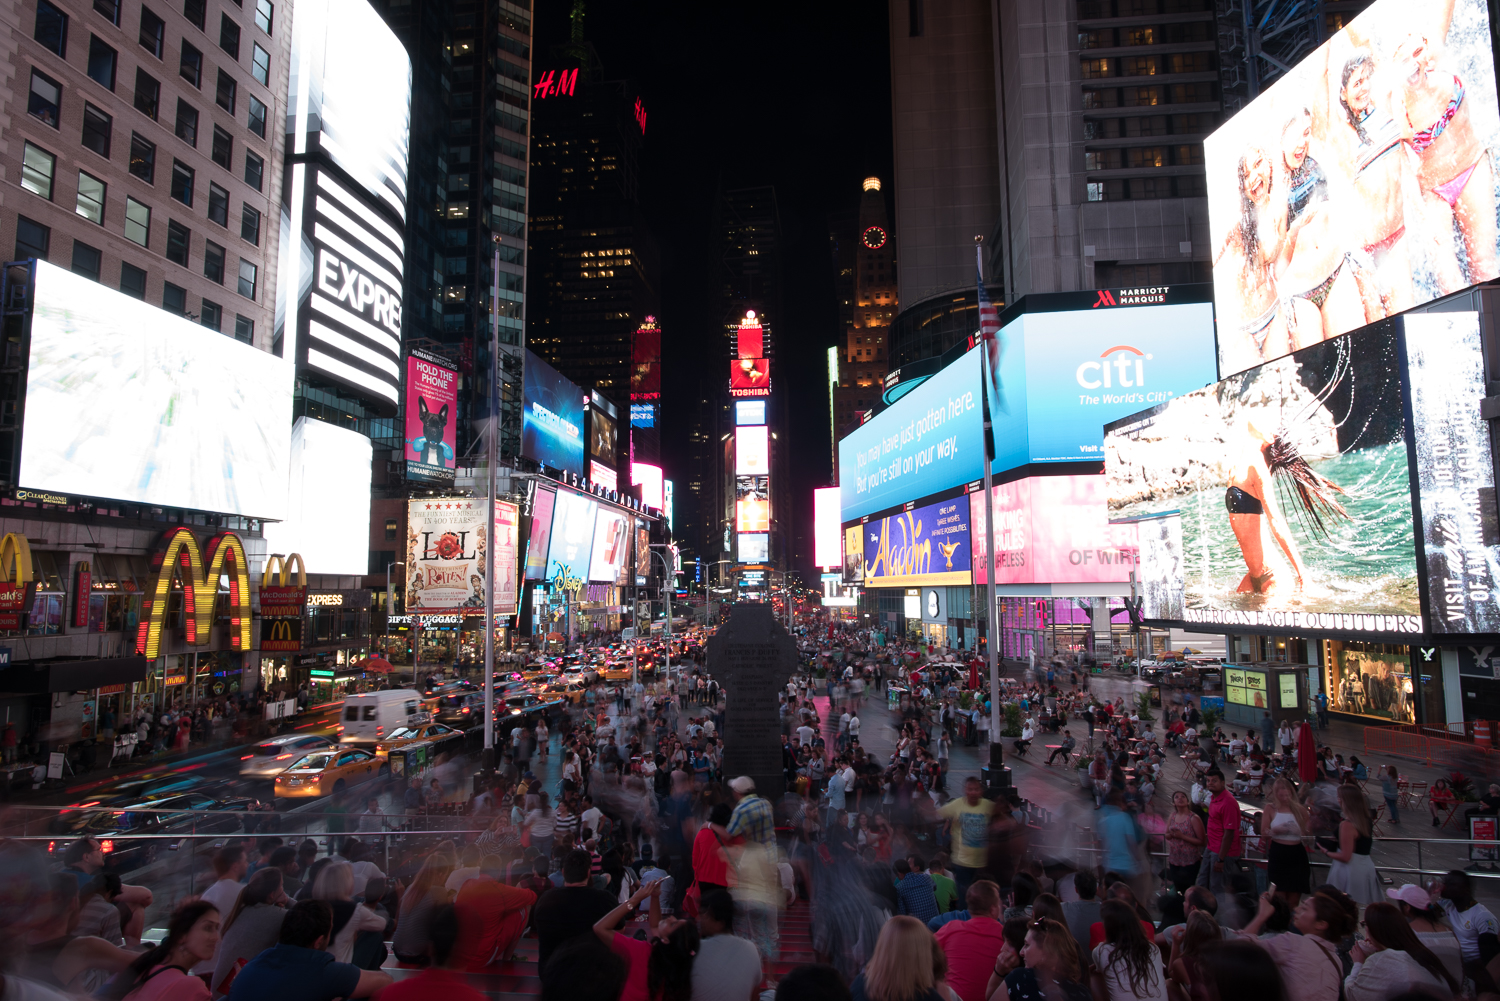
Going BOLD with HDR
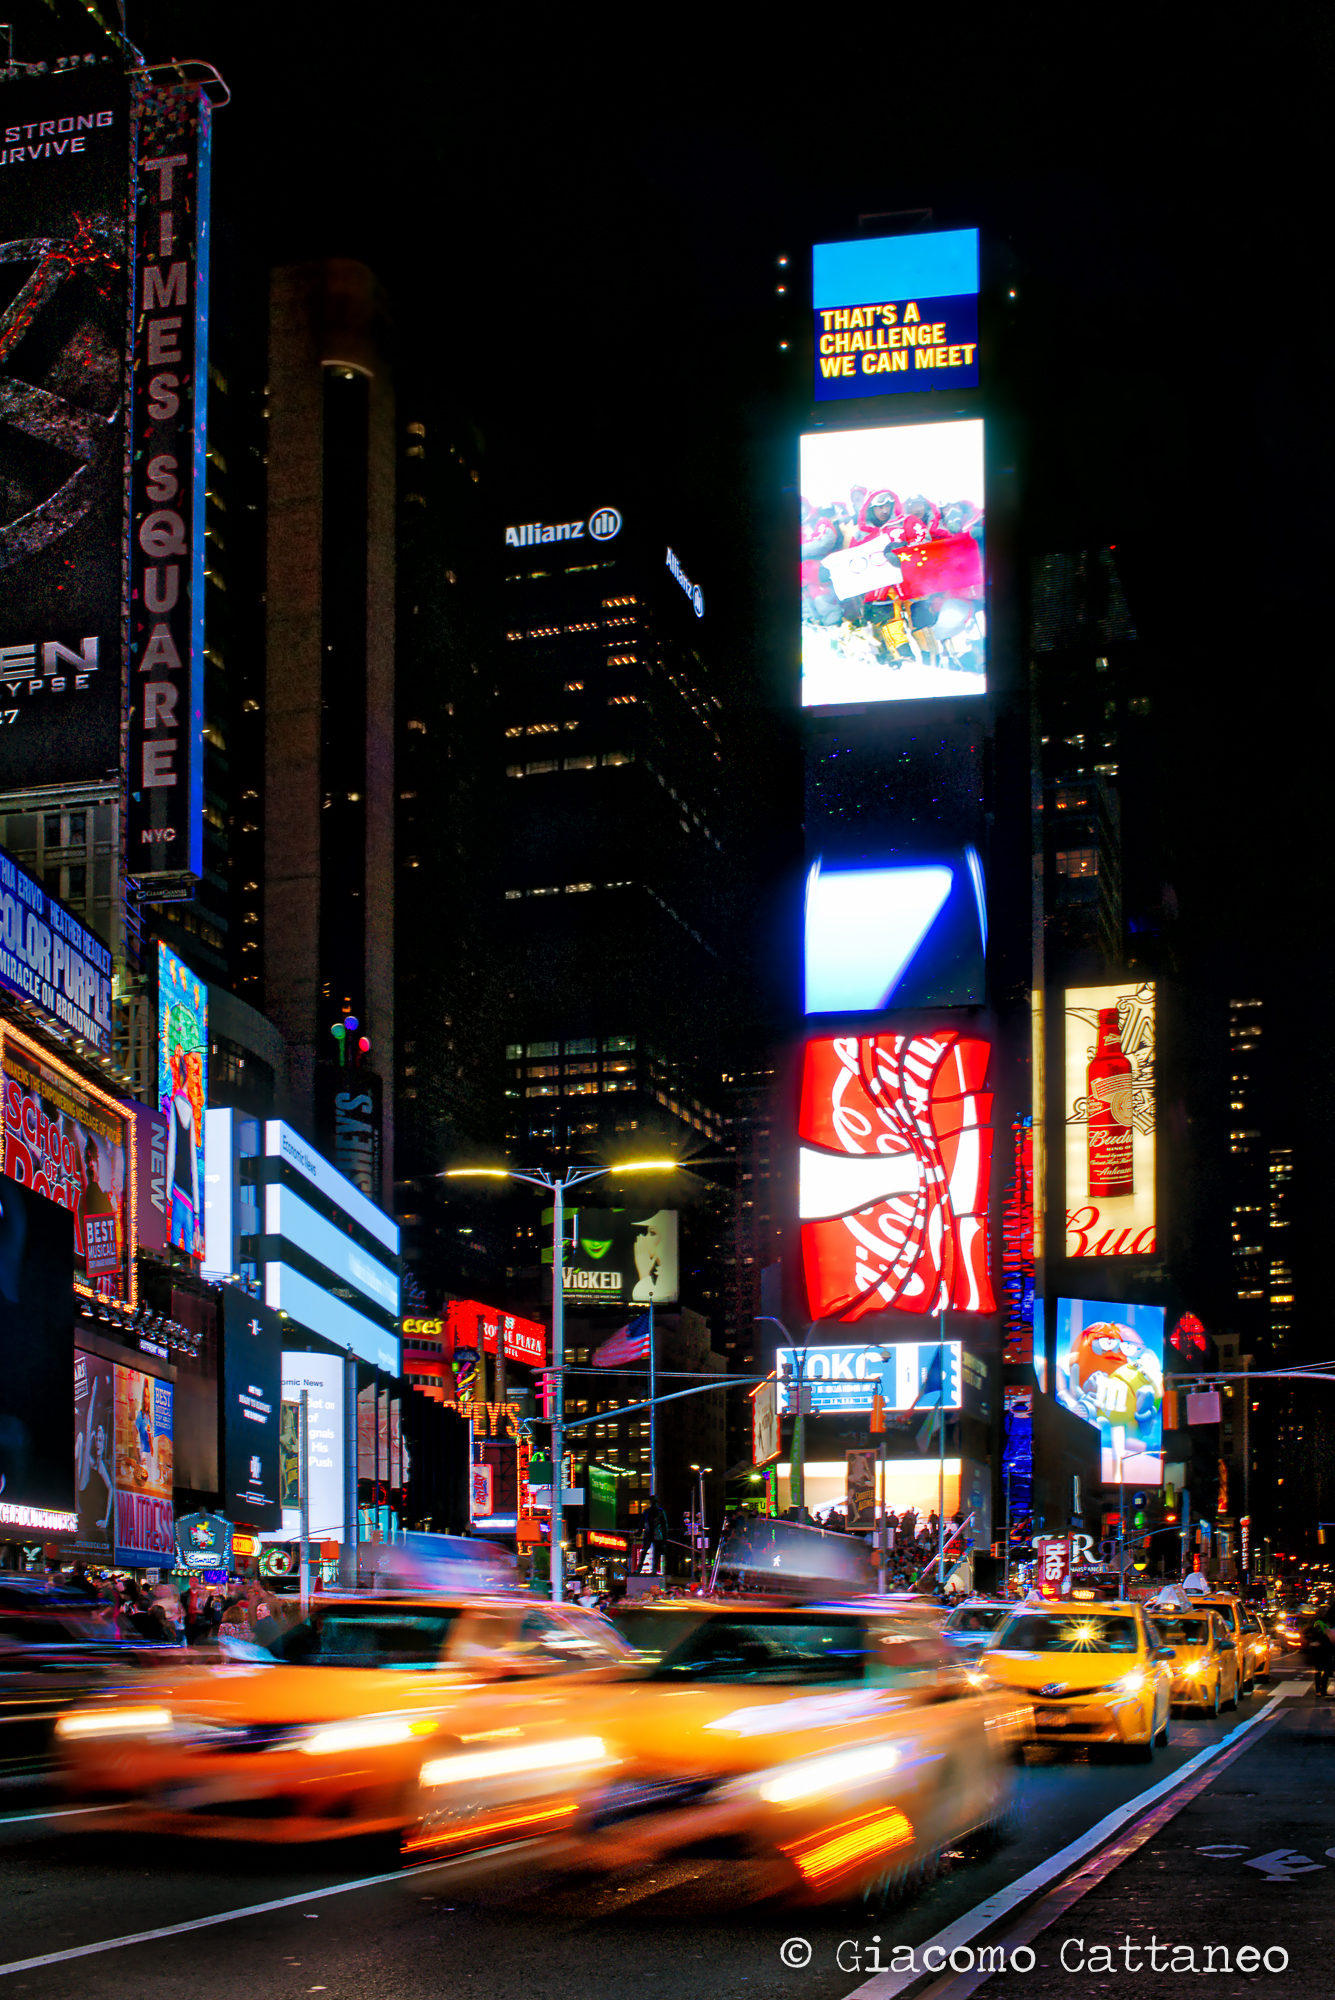
There was something I had been looking forward to do in NYC: HDR, high-dynamic-range photography. The concept is the following: the camera is not as good as the eye. While the eye can absorb and balance out all kinds of bright and dark colours at the same time, the camera can select only one in situations where they are at their extremes. Think about the usual struggle of taking a picture against the sun at sunset, and the frustration of either having the sun look good but the rest black in the foreground, or the foreground nicely exposed with a white-washed sky. Enter HDR ---> a process of combining multiple exposures (from dark to bright) into a single picture. Some of the pictures above of Brooklyn Bridge are an example of such. Not always they come out "right", and often look too artificial. I thus stay away from HDR most of the time. Yet, I felt like giving it a shot while being in NYC, and test out what I could achieve. Such experiments are below: on the left, inside a messy record shop in Greenwich Village made from one picture only, while the one on the right is again Brooklyn Bridge made from 5 pictures. By shooting in RAW format multiple exposures can be created from one (even though it's not the best way to do so) - it was useful in the case of the record shop, as I could not shoot 3 exposure without a tripod and the owner gave me permission to shot one (and only!) picture. For both I used a new software called Aurora, developed in collaboration with Trey Ratcliff, one hell of a photographer, who is also doing a very interesting show series about Becoming an Artist (with stories, techniques and how-to)


This one below is the picture I always wanted to take - Times Square, boomified. Normal camera settings won't really give great results in Times Square - it is much better to use the iPhone camera for whatever reason. True story. Yet, I knew this was the perfect HDR situation: strong light coming from all over the place, like having multiple sunsets, yet the scene in between should also be exposed enough not to be dark. Moreover, it's wiiiiide, so a panorama photo might also be the way to go. Thus, using a tripod, I combined 6 positions for 3 exposures each, a total of 18 pictures. Here is the result (do click on the image to enlarge it!):
Pretty cool, eh? Definitely over the top, but if I'm not allowed here to go for it, then when? As the process is quite interesting, let me guide you through it so you can see yourself. I'll be using another wide-angle picture that I did in case I could not stitch the panorama together (and almost failed at that, took me hours to fix):
1) Take 3 pictures with the "bracketing" mode in your camera (in mine is a small button called BKT). Use a tripod while setting up the camera to shoot automatically 3 pictures in a row through a remote controller or a 2sec delayed release (so it does not vibrate from you pressing the release button). Be careful to be in total manual mode! I had to throw away many series because I forgot something (like auto ISO, damn it!). Thus, manual mode & manual autofocus - basically the camera should not do anything on its own, but only take 3 pictures with different shutter speeds, the rest should stay the same:


2) combine them into 1 exposure with a software (Photoshop is not that good but it works, so does Lightroom). This is the screenshot from within Aurora on the left once imported into the software, while on the right is after I've applied some tweaks to achieve the look I wanted (the software uses information from 3 pictures simultaneously to achieve that) - note how both the screens and the people are now visible and of similar exposure?

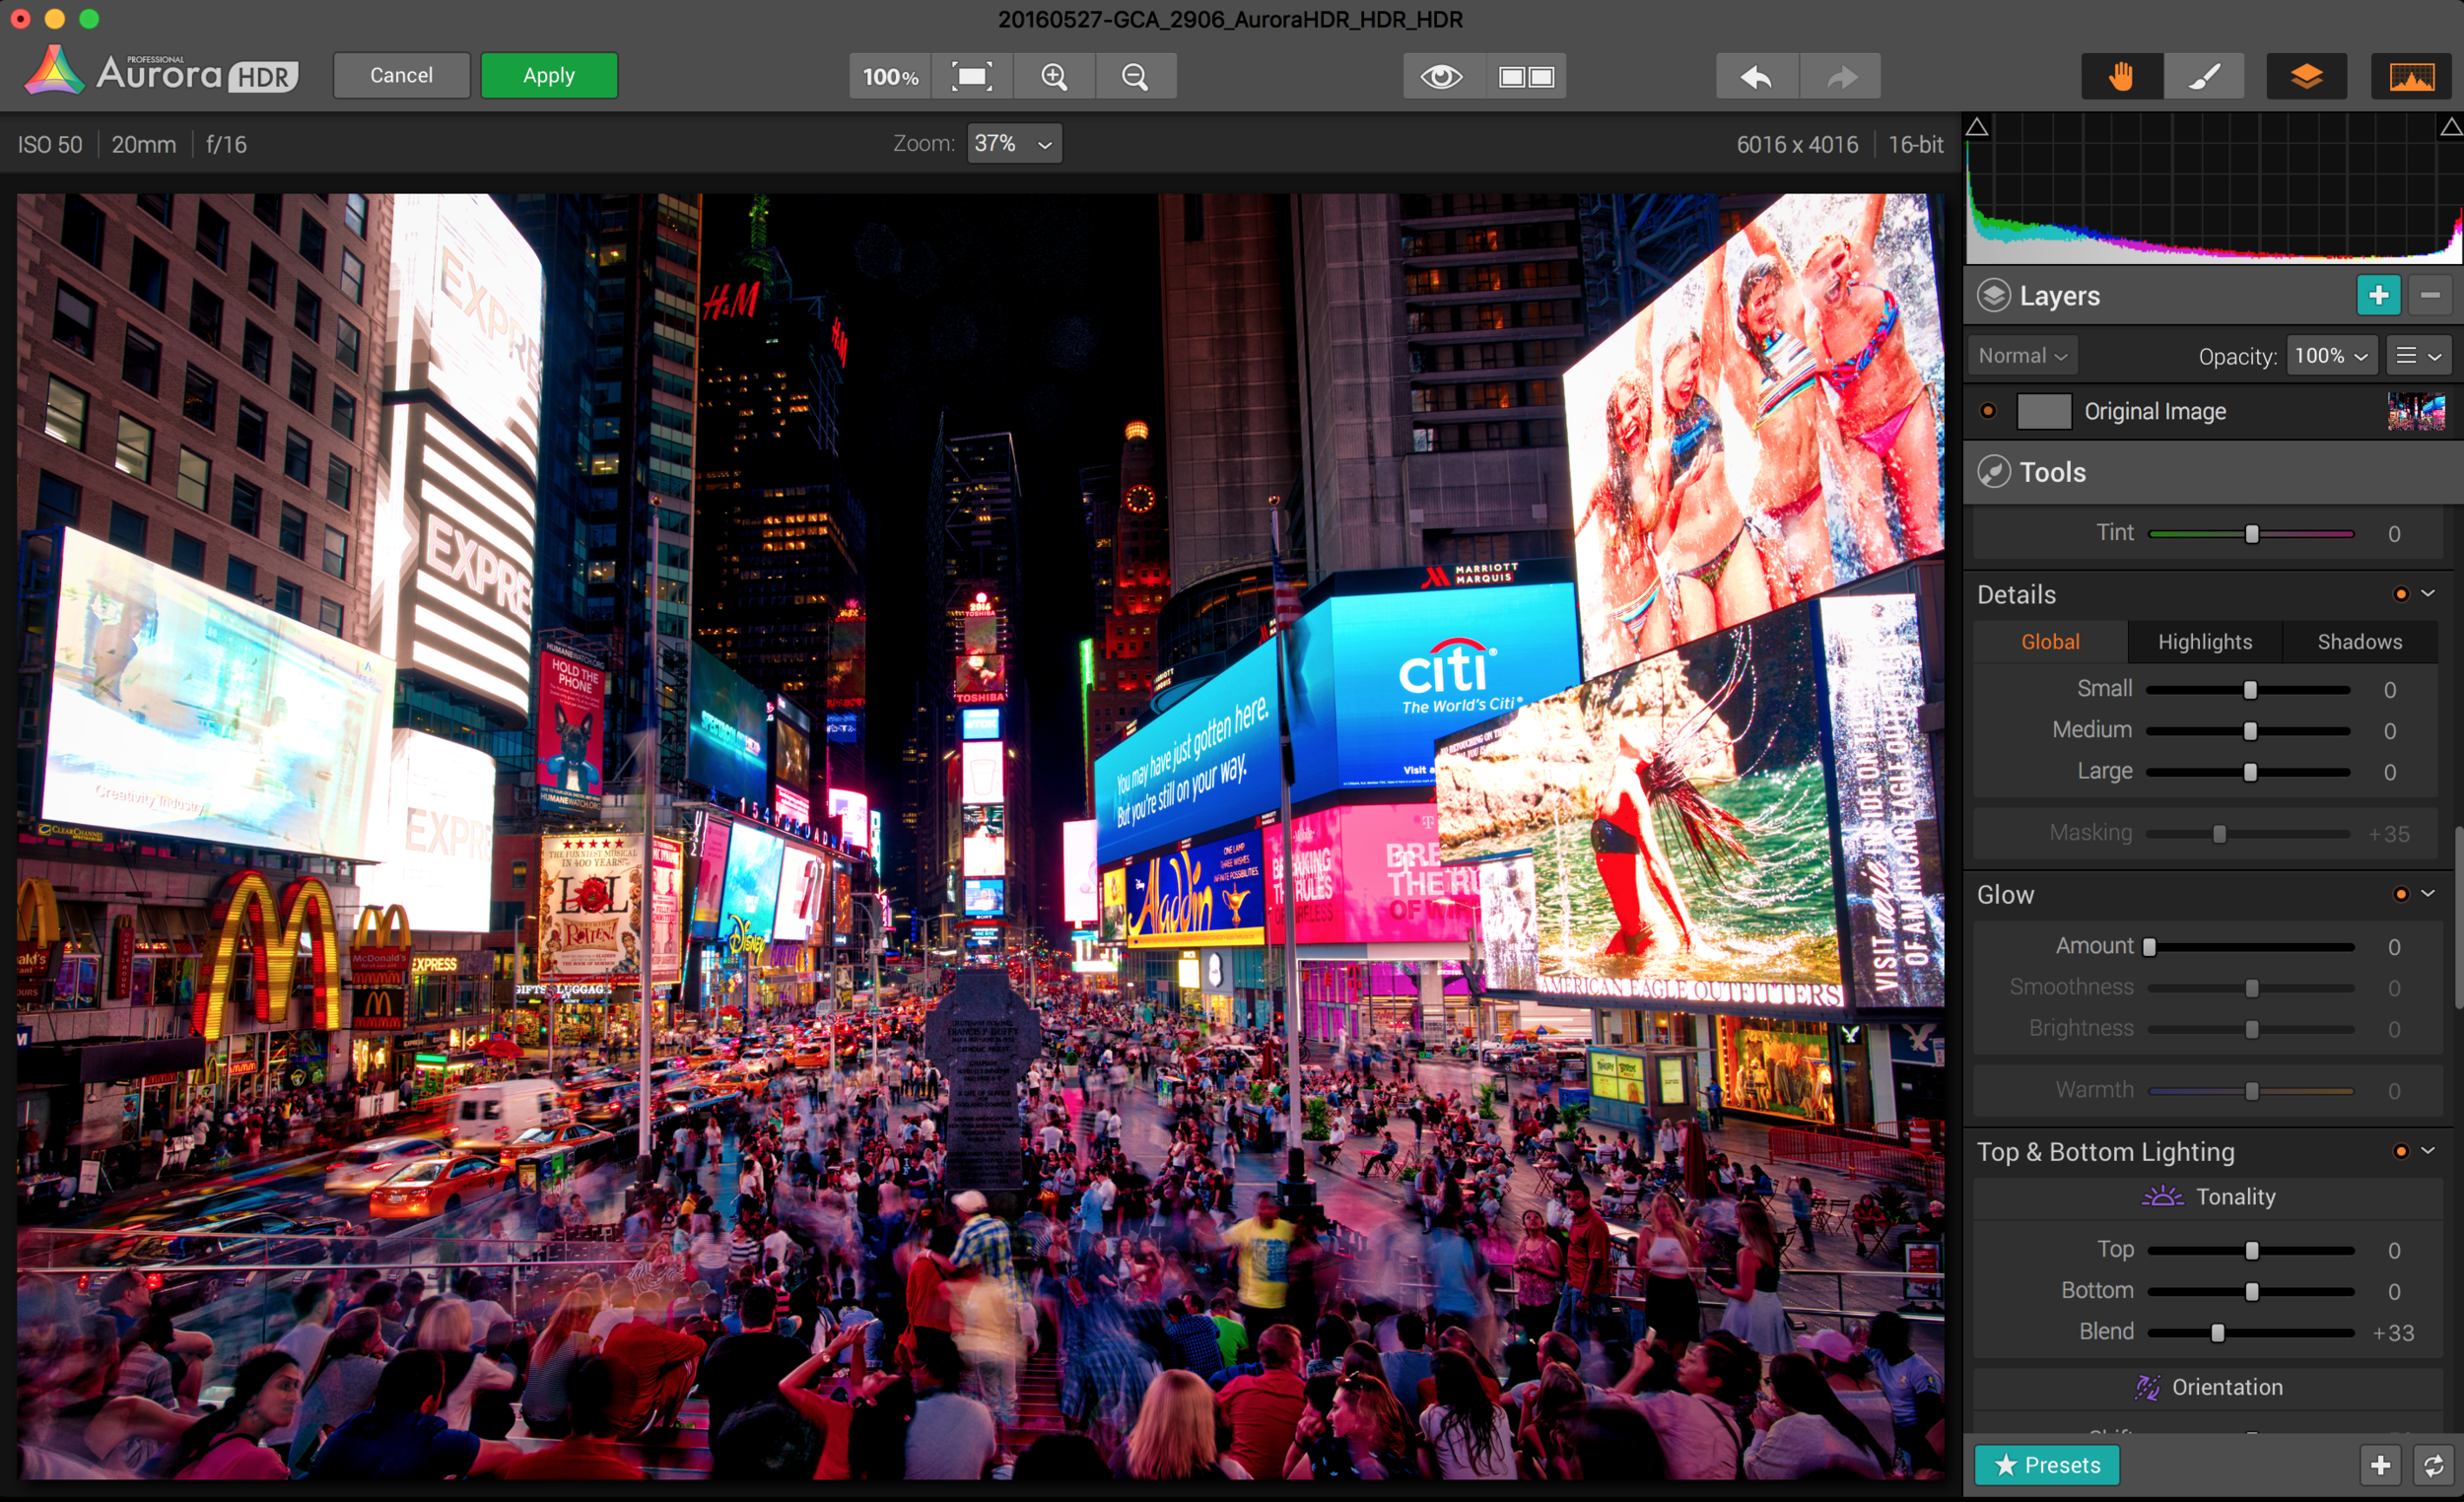
3) Still, there is a problem - some of the screens had rotating images, so that while taking the shots they changed. Also, the HDR somehow did not really made sense of all that light, so that many of the screens look better in the darker of the image. What you can do then now is to "paint" the dark image on top of the newly created HDR with photoshop with a mask that will only select the screens areas. See this here below, plus the final result:


Final result out of 3 exposures and the use of both Aurora HDR and Photoshop - Times Square, baby!
So, this is it. Quite a long post for only 2-3 days of pictures, my apologies. Not that anybody will read this through - if you do and read this, let me know and a beer is on me!!! =)
Ciao, baci & abbracci!
Giacomo